DIY Concrete Faux Stone Facade, Part 3 — Pouring The Faux Concrete “Stones”
I spent yesterday testing out the best way to pour my faux concrete “stones” for the front porch skirting. This is my first time ever to work with concrete**, so I was still feeling a bit unsure about my plan. But I had watched many videos about making molds and pouring concrete, so I felt ready to forge ahead.
**UPDATE and correction: Wow, this was a MAJOR oversight on my part! My brother and I poured concrete countertops in my kitchen! 😀 In my defense, that was over a decade ago, and I did have lots of help. I don’t think I’ve ever done another concrete project all on my own with no one here for backup and support, so this is still new territory for me. But wow. How could I forget pouring concrete countertops?! 😀 Anyway, moving on…
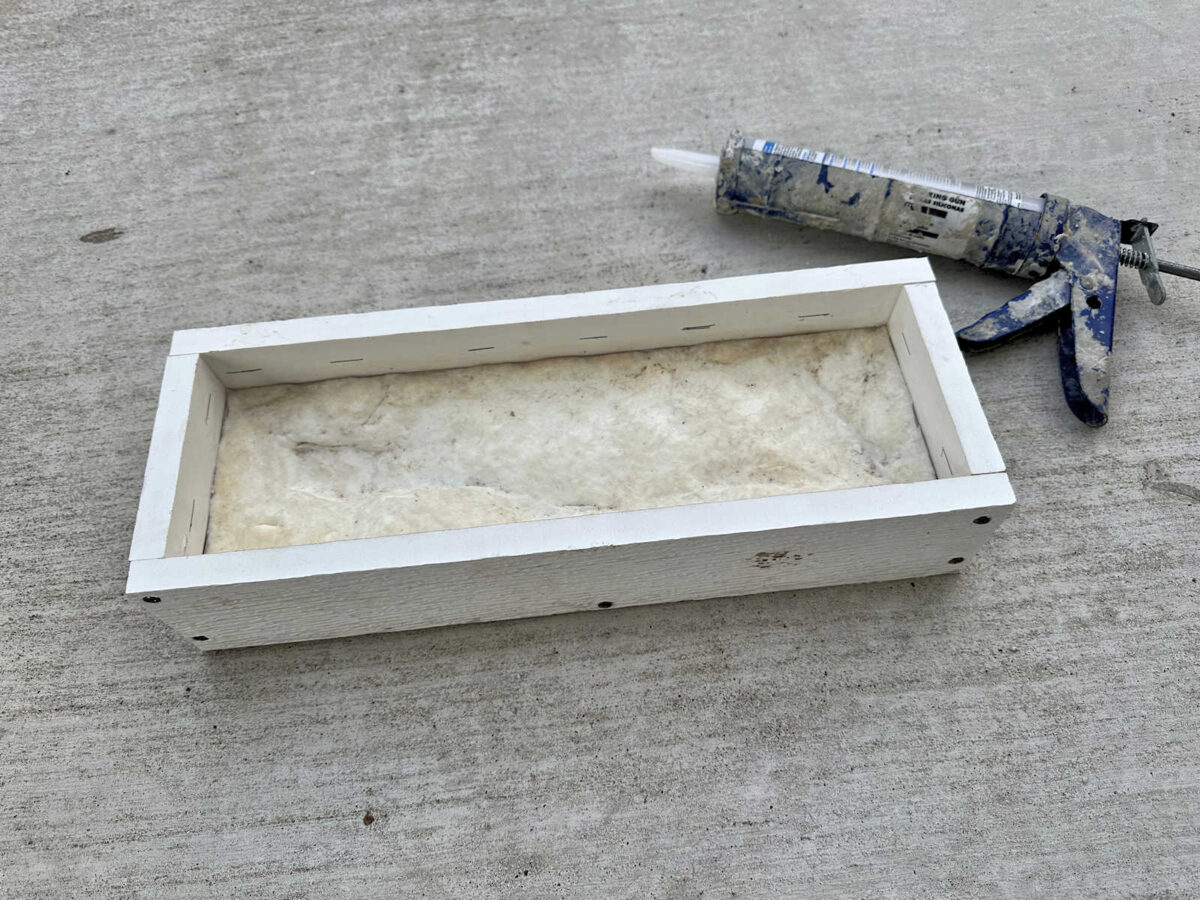
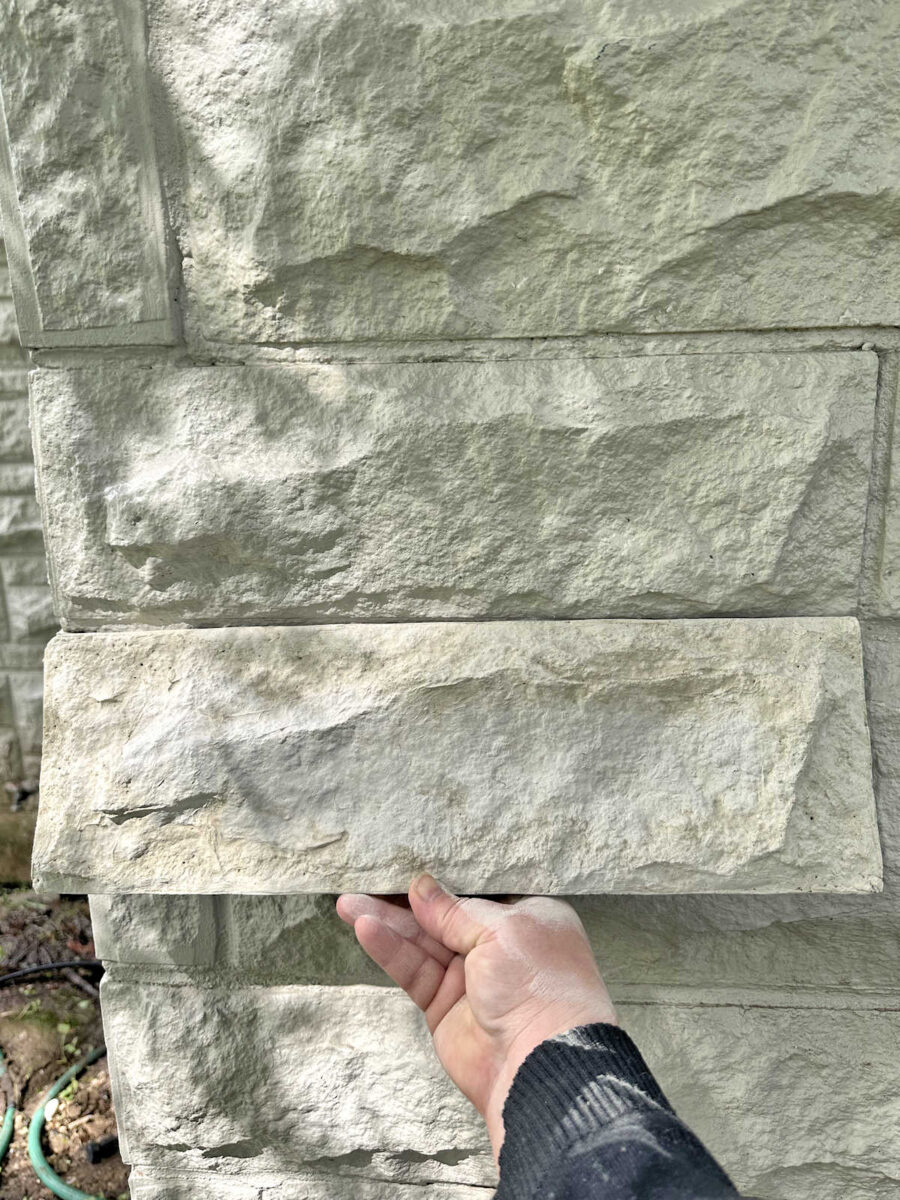
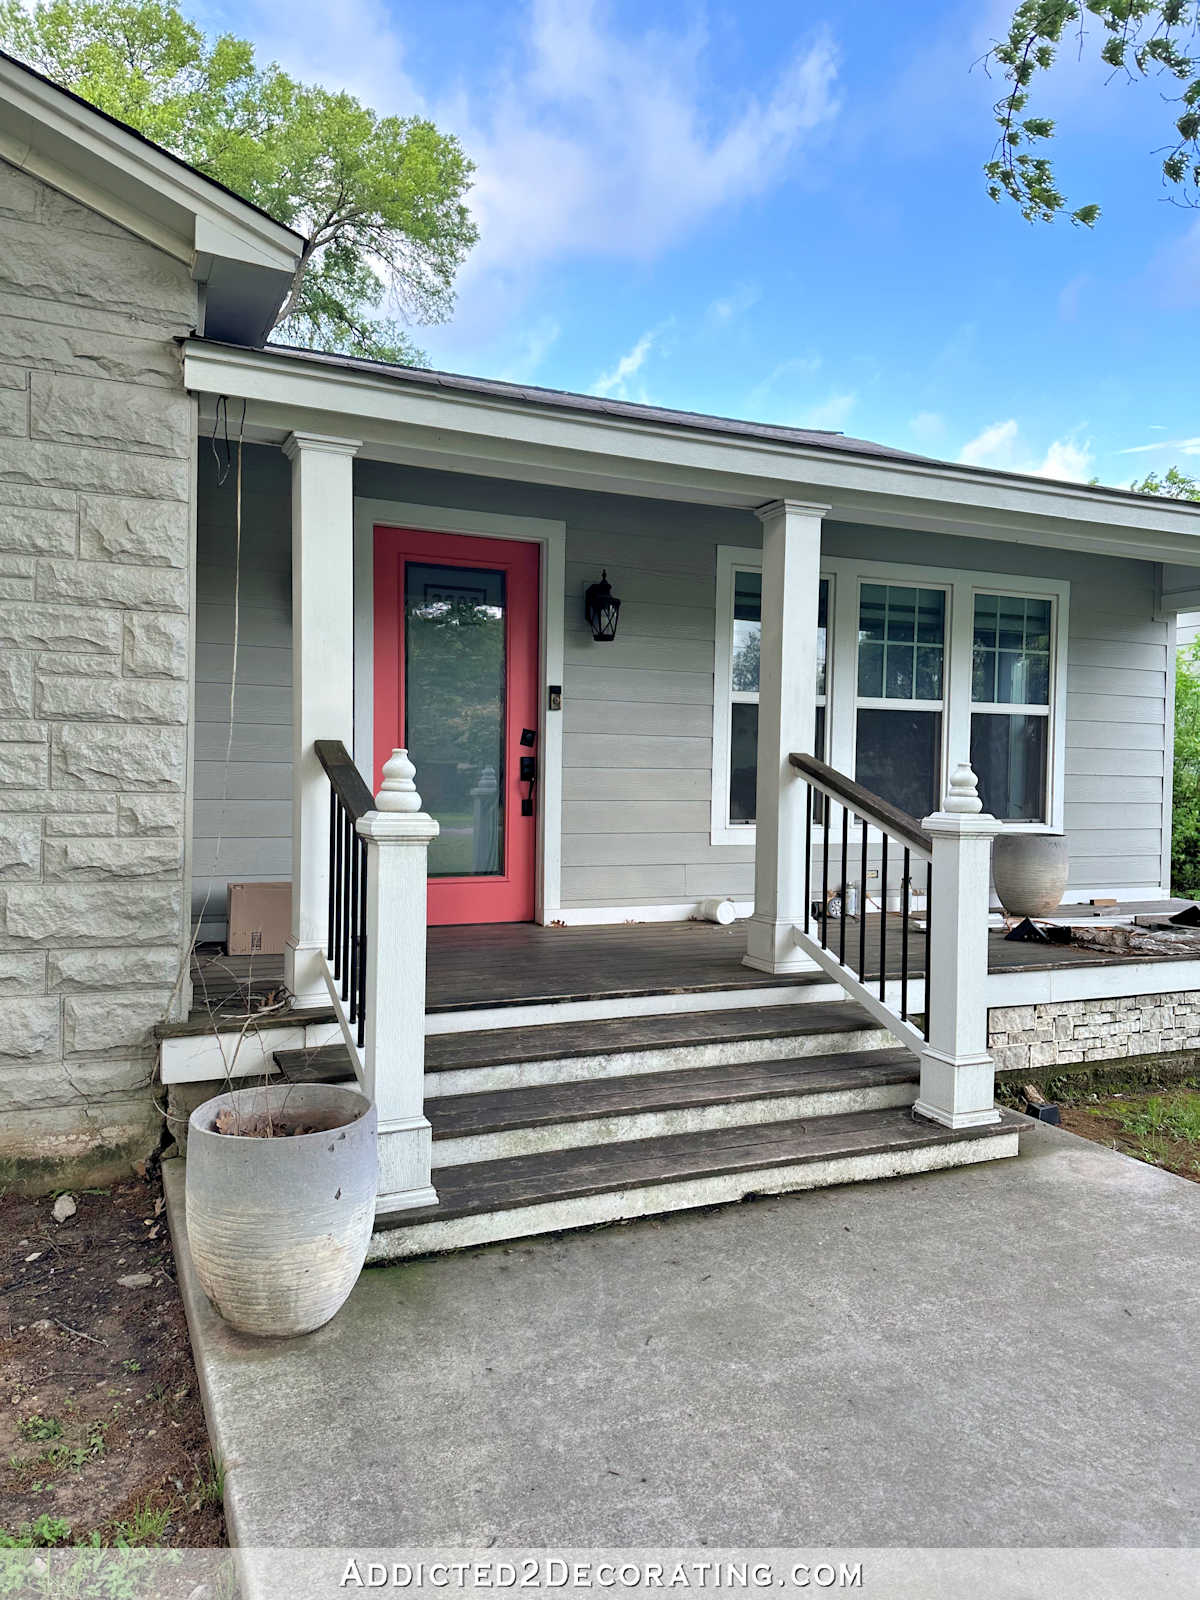
If you’ve been following along, you know that I had gotten as far as creating my own silicone textured mats using the actual stones on the front of our house and then turning those silicone mats into molds that I could use to pour my own concrete stones for the skirting.
Note: This is a multi-post project. You can see all posts about this project here: DIY Aircrete Faux Stone Facade Archives
Or you can see the previous post here: DIY Aircrete Faux Stone Facade, Part 2 — Building The Silicone Molds For Pouring Fake Concrete “Stones”
I tried three different times before I had success, so let me tell you about the failures and what went wrong before I show you the success.
Test #1 — Aircrete faux stones with a quick-cure concrete — FAIL
I was so focused on this process that I forgot to take pictures of this first attempt. But my original idea was to make my own aircrete (which is about 50% lighter than concrete) to make my stones. I came across this very helpful video showing a very easy recipe for DIY aircrete using items you probably have in your kitchen (especially if you’ve ever done a ketogenic diet).
My one issue with the process he shares is that he uses plain Portland cement to make the aircrete, and Portland cement takes a long time to cure. I was hoping to find a way to make aircrete with a quick-drying concrete formula instead of the very slow-curing Portland cement so that I could get through several pours with each of my six molds in one day.
Before I tested this, I left a comment on that video to ask if he thought it would work. He seems to know a great deal about chemistry, while I’m very ignorant about the topic. I wasn’t sure if the extra ingredients in a quick-dry formula would negatively interact or counteract the aircrete formula. He actually responded within minutes and said that he thought it might work as long as the quick-dry mix doesn’t have an aggregate in it.
Unfortunately, as far as I can tell, there’s no such thing as a quick-dry cement mix with no aggregate. The closest thing I could find at my local Home Depot is Rapid Set Cement All, which uses a super fine sand as an aggregate. So I decided to give it a try.
Rapid Set Cement All, when mixed with water according to the instructions, sets within 15 minutes and is supposed to cure in about an hour. But again, that’s when it’s mixed with plain water. But I tried it mixed with the aircrete liquid formula from the video.
It didn’t work. Or I guess it would be more accurate to say that it probably would have worked had I given it more time to cure, but giving it two hours to dry, it had only reached the consistency of a firm moist beach sand, kind of like the consistency that you would want to build a sandcastle on the beach. So the aircrete liquid formula definitely cancelled out the quick-cure feature of the Rapid Set Cement All, and that’s the exact feature that I needed.
So at that point, I had two options left. I could use the exact aircrete formula using plain Portland cement, which would allow me to pour six stones per day, or I could just use the Rapid Set Cement All and mix according to the instructions (i.e., using plain water) and be able to pour several stones per mold per day. I decided to go with the second option.
Test #2 — Rapid Set Cement All with a textured back — FAIL
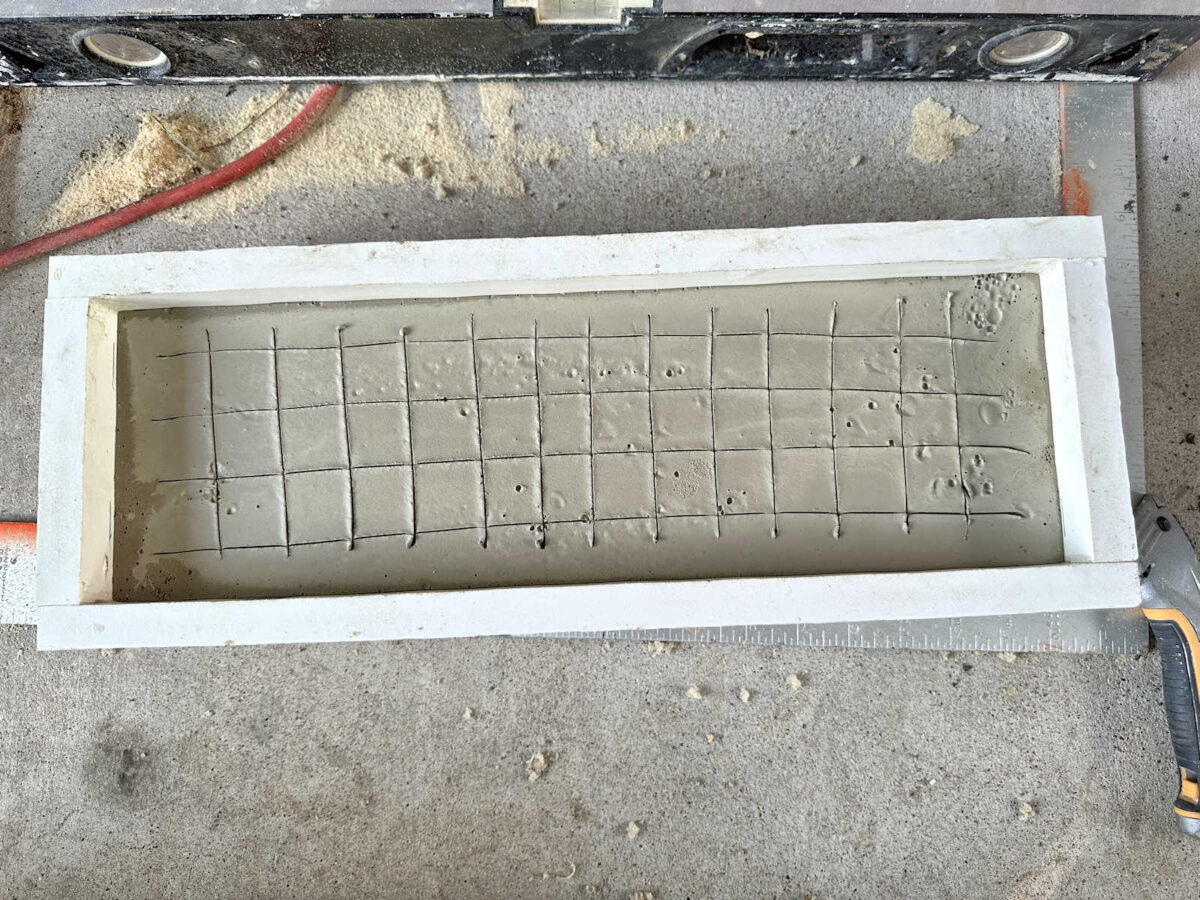
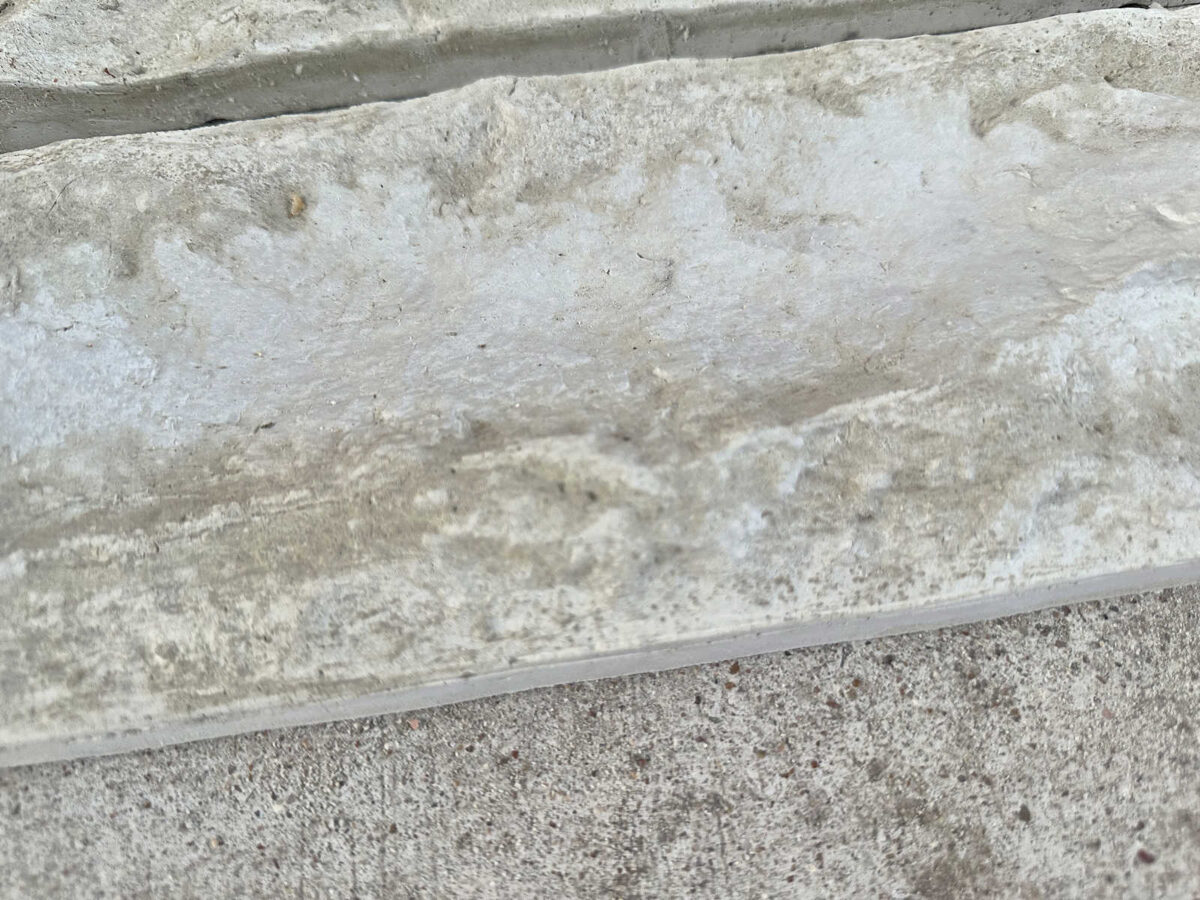
On my next attempt, I followed the instructions to mix the Rapid Set Cement All, which is about one part water to four parts of Cement All. I mixed it in a very small batch, just enough to fill my mold, and then poured it into the mold. It began to set very quickly (in under 10 minutes) so I was very hopeful.
But since I knew I was going to be adhering these faux stones to the skirting area of my front porch, I thought it might help the adhesion to add some texture to the back of the stone. I did this using my utility knife, and I just barely ran the blade over the surface of the concrete.
That ended up being a mistake. And then I made a second rookie mistake, again, because I’ve never worked with concrete before (correction: I have, but it’s been over a decade). I gave it the hour that the instructions say, and it felt very hard to the touch. But I noticed it also still felt very hot, meaning the chemical reaction that cures concrete was still happening. But I was anxious, so I ignored that and tried to demold the stone.
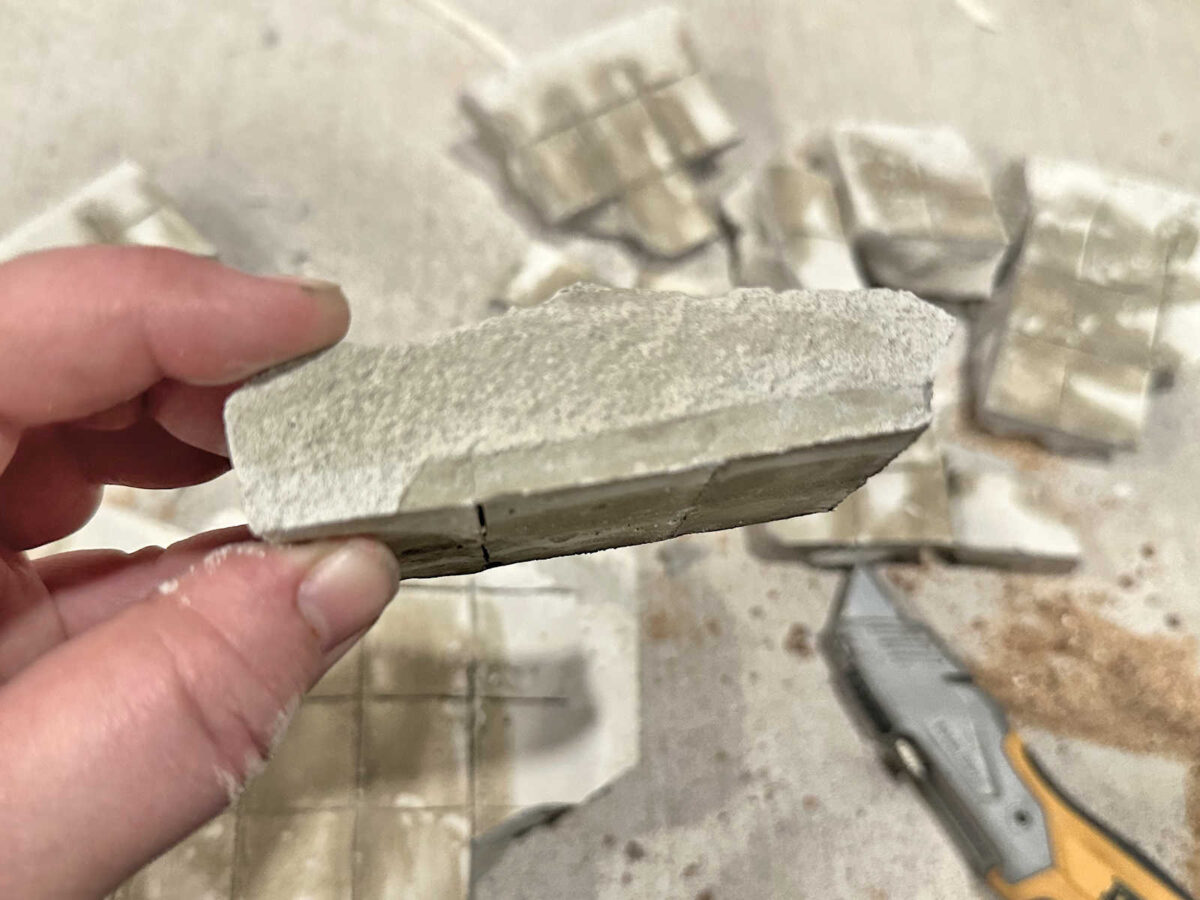
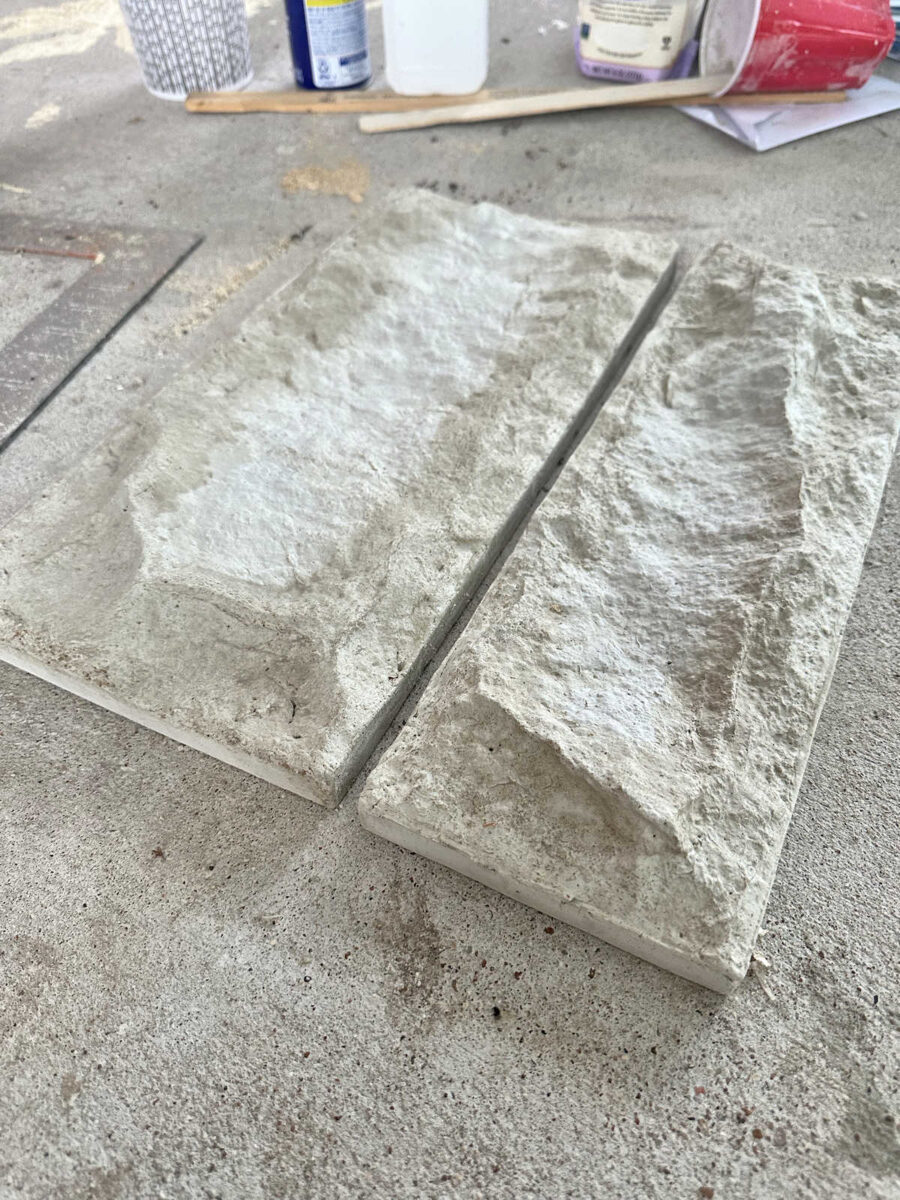
As I was removing the stone from the mold, it snapped in two right down the line shown by the arrow below.
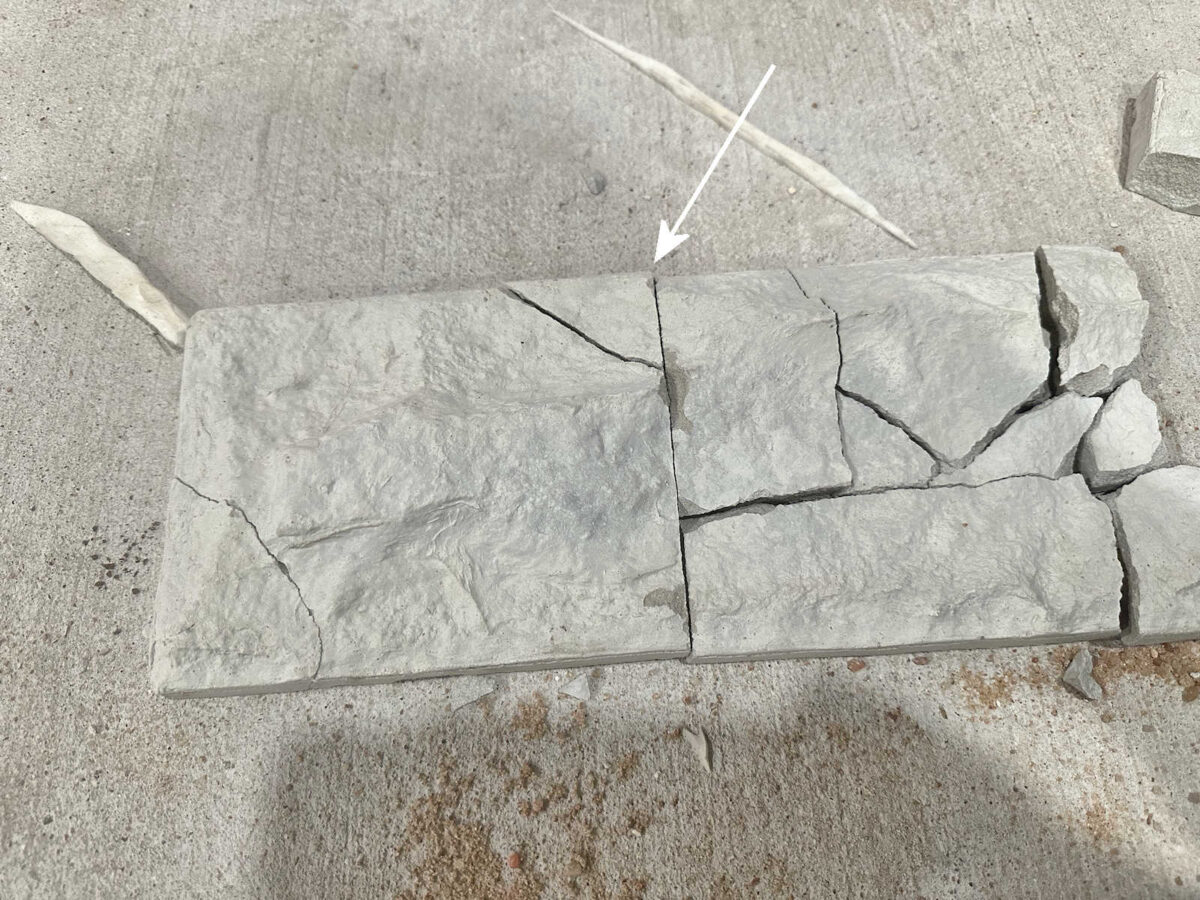
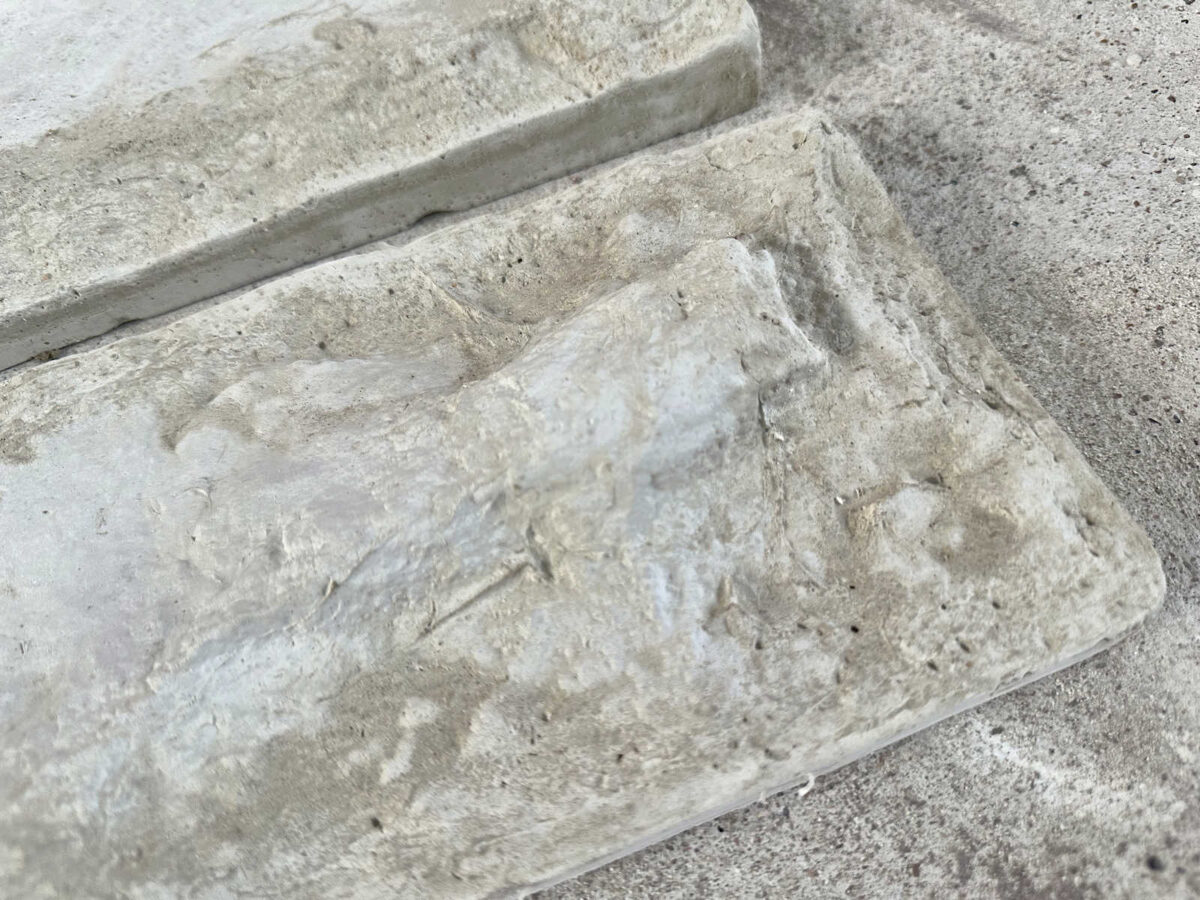
Since it was ruined, I decided to test out the strength of the Cement All at that point, so I picked up the two big pieces and dropped them onto the concrete, and it continued to break. From the front, it looked like random breaks.
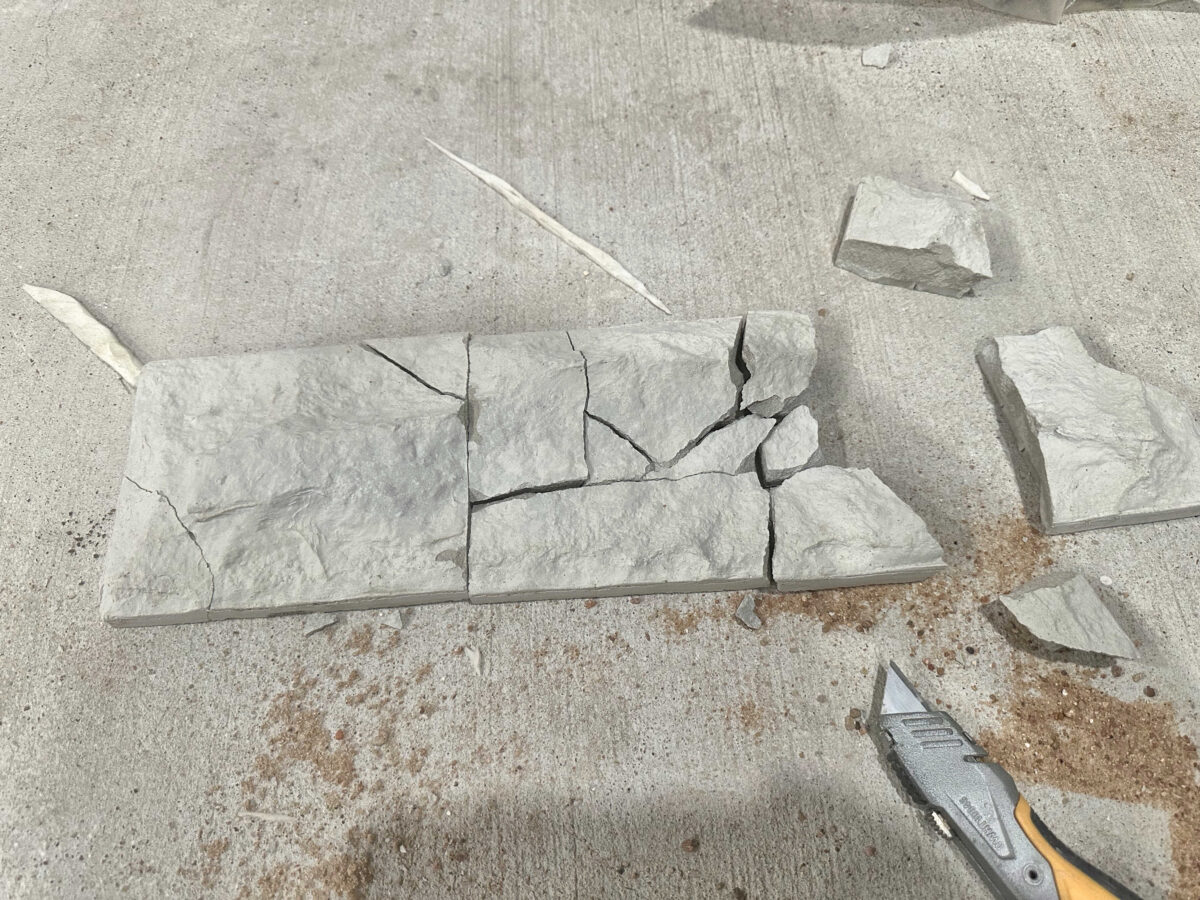
But these were not random breaks. When I turned the pieces over, I could see that the breaks on the backs were exactly along those texture lines that I had made on the back.
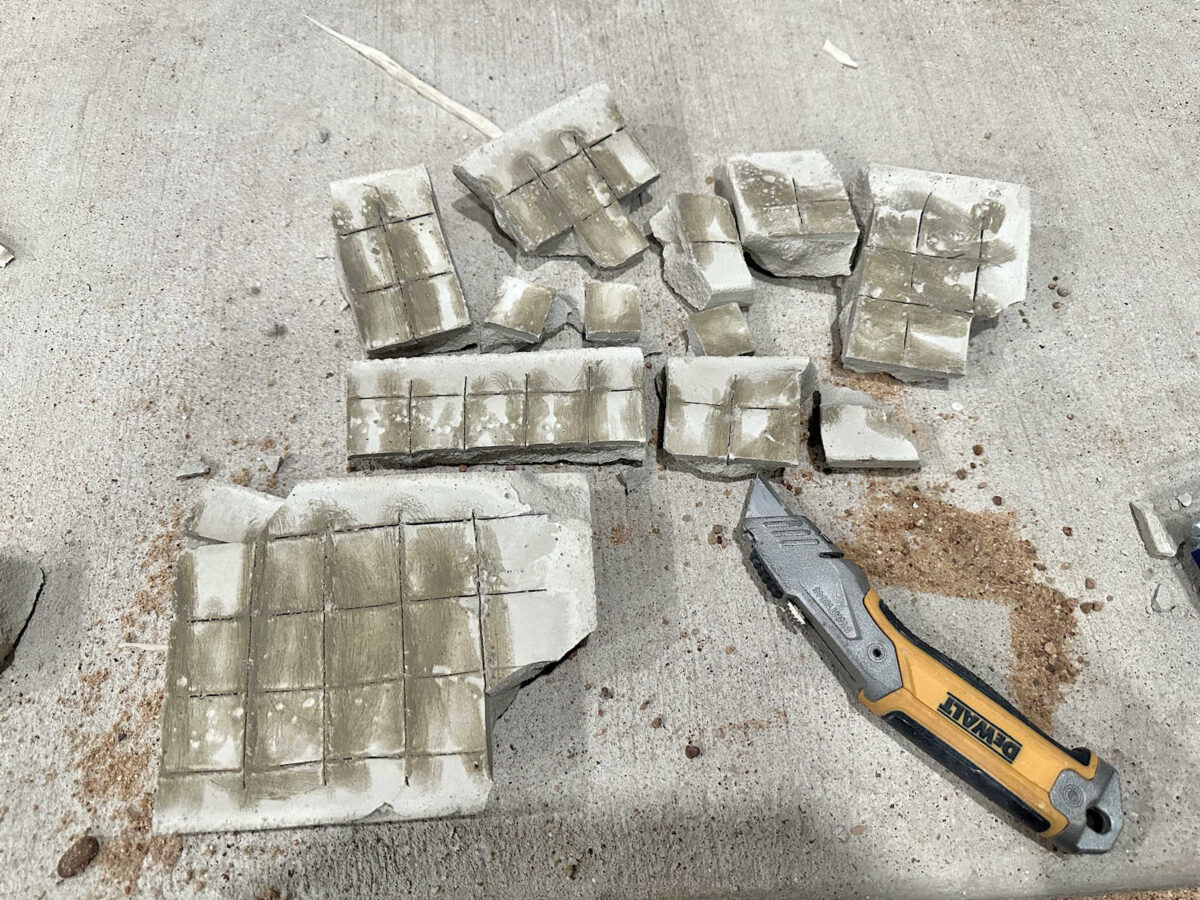
You can see here that I didn’t even make those texture lines very deep at all, but they definitely affected the integrity of the concrete.
So this was a very helpful test, and a very important learning experience for a concrete newbie like me. The first important lesson is that you never remove concrete from a mold if it’s still hot to the touch, even if you’ve waited the amount of time the instructions say to wait. As long as it’s still hot, the concrete is still curing. You have to wait until that heat has completely dissipated before removing it from the mold. The second important lesson is that you shouldn’t mess with the back, probably especially on something as thin as 3/4″ faux stones.
With my new knowledge gained from this second failed attempt, I was ready to try a third time.
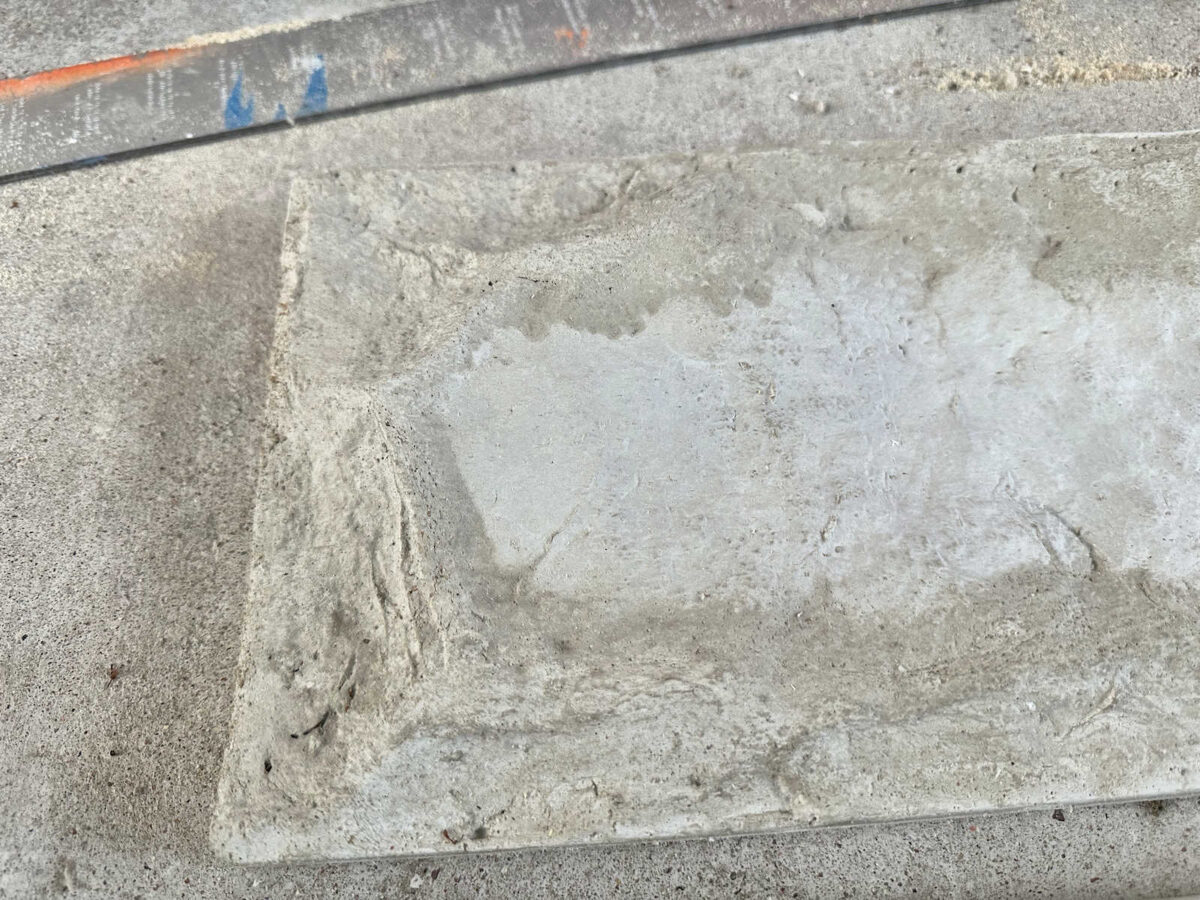
Test #3 — Rapid Set Cement All again — SUCCESS!
Again, I mixed up a very small batch of the Cement All and poured it into my mold. And by the way, before pouring the concrete into the mold, I sprayed the mold with WD-40 to act as a mold release. This time, I left the back alone.
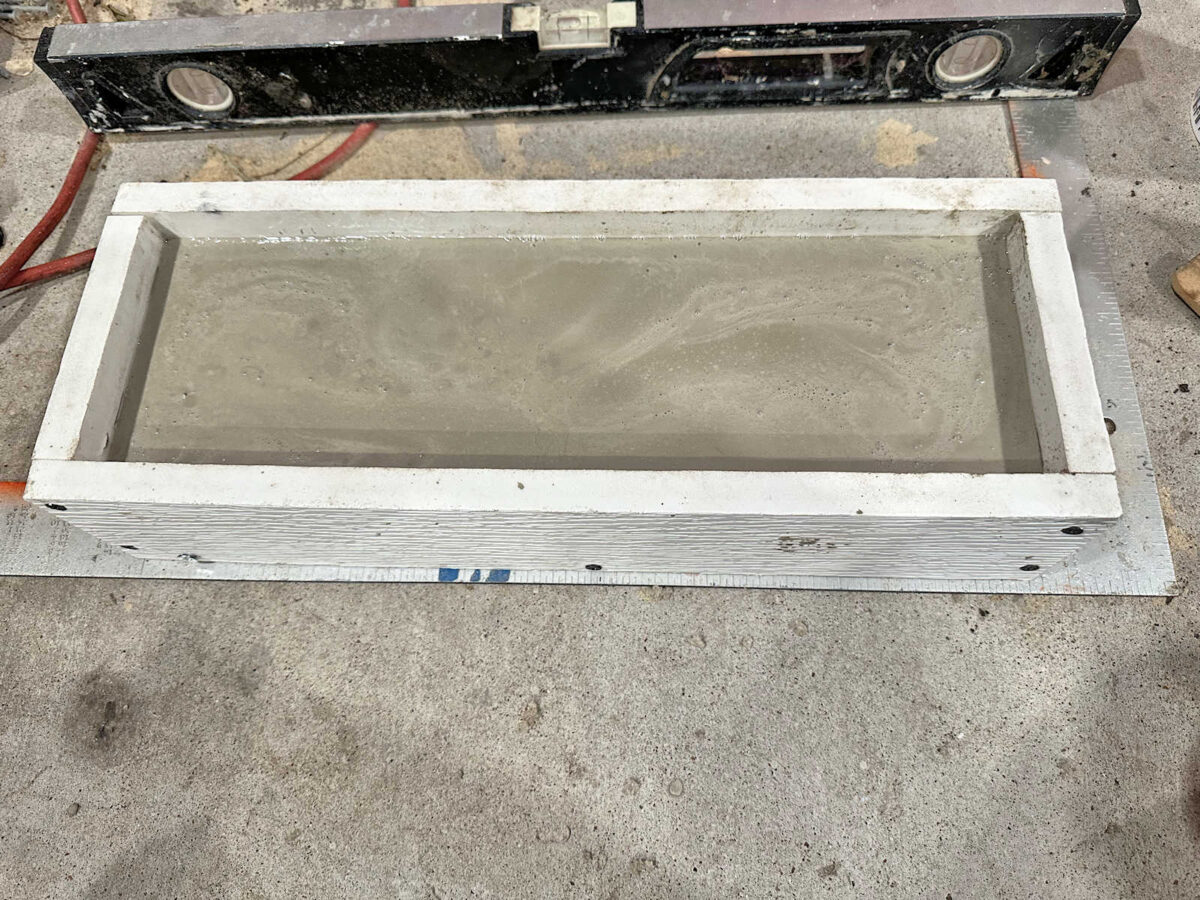
And this time, I also waited not only until it not only felt really hard, but it also felt cool to the touch. I’m not sure how long that took because I got busy on something else. I would guess it took about an hour-and-a-half or two hours. Then I removed the small end piece of my mold and removed the stone.
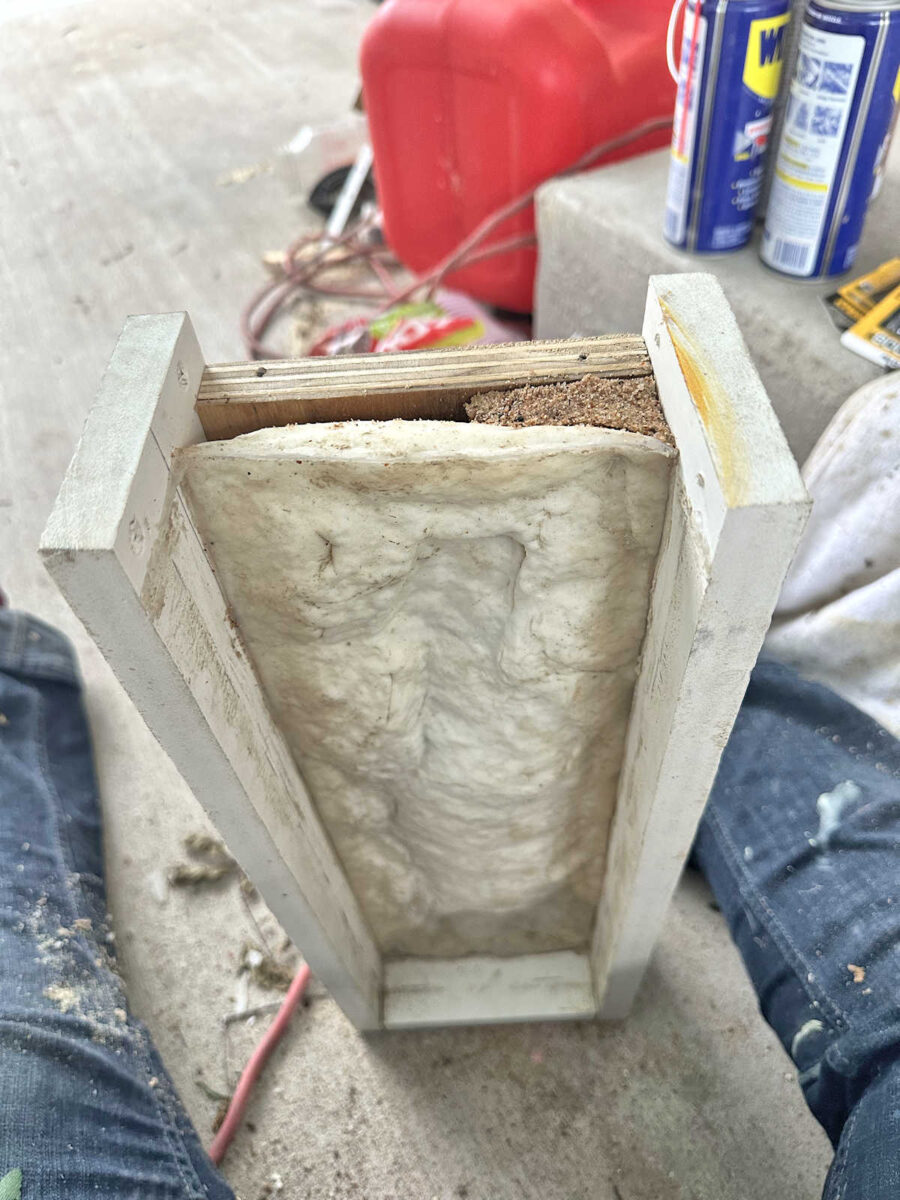
This was a success! For this test, I used two of my molds and poured two stones, and they both came out great. I think the WD-40 caused some discoloration, but since I’ll be priming and painted these stones, I’m not concerned about the color at all.
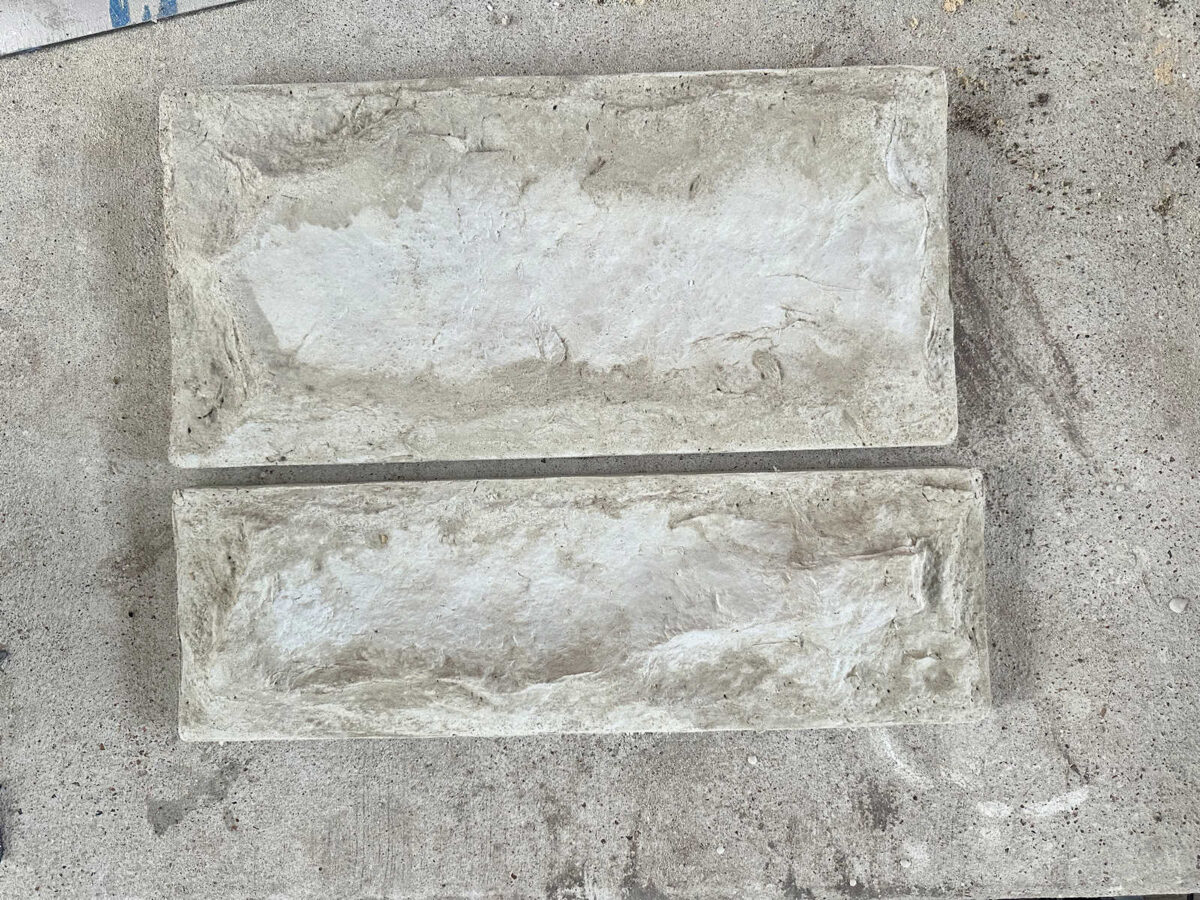
I was so excited when I pulled these two stones out of their molds and saw the finished result.
Other than the color, they looked just like they could fit right in with the stone on the front of our house.
Because of the discoloration, it’s a little difficult to get a good, accurate picture of the stones. You might just have to take my word for it. 😀 They look so good!
UPDATE: Here’s a comparison of the smaller one with the original stone that I used to create the silicone textured mat.
Doesn’t that look good?! I really couldn’t be happier with how this turned out. The funny thing is that the natural color of the Cement All with the discoloration caused by the WD-40 actually has a very natural Austin stone look. But I’ll be priming and painting mine to match the rest of the house. And there’s no need to worry about the WD-40 affecting the paint. I’ll be using my favorite shellac-based primer (or maybe my second favorite oil-based primer) first, and it will seal that WD-40 so that it won’t cause any problems with the paint.
Now that I have my process down, I need to set up an assembly line in my carport with all six of my molds so that I can pour six at a time every two hours.
I have one more week to work on outdoor projects before I want to turn my attention to the storage room in our bedroom suite. I’m really hoping that I can get the front porch finished in that time!
More About Our House Exterior & Yard

see all exterior &
yard diy projects

read all exterior &
yard blog posts

Addicted 2 Decorating is where I share my DIY and decorating journey as I remodel and decorate the 1948 fixer upper that my husband, Matt, and I bought in 2013. Matt has M.S. and is unable to do physical work, so I do the majority of the work on the house by myself. You can learn more about me here.
Looks dandy! You are a better paint expert than me but…my overthinking head is not focusing well. The current thoughts are, Concrete is porous like grout, it’ll soak up WD-40. See if you can paint those before adhering to the wall and ensure the WD-40 doesn’t add too much oil to the the fresh surface for painting. You may just need a degreaser step to for paint to adhere or simply use a different release agent.
Yeah my alarm bells went off at the WD40 too, it also being a water displacer and what that might do to the paint layer. Definitely recommend a test first!
I was thinking the same thing as you and Sewducky. The faux stones looking amazingly like the real stone.
P.S. Kristi, If this is going to take a few more days than your birthday deadline, I would forge ahead and finish the foundation work. You know everyone wants to see the final result!
I will. I won’t leave it unfinished. But I’m going to do everything within my power to meet that goal.
You are a determined worker bee. Best of luck.
I apologize if I came across like I was telling you what to do. You work so hard and take care of Matt. If you want time off from outdoor projects in the Texas heat to do indoor project or just to relax you are more than entitled to it!
Yes, that is very good “overthinking”. It could cause a problem, better to know sooner than later. I’m hoping to do a stone facing under my front porch ceiling. Anxious to see your results, and how many mistakes this will save me. This will look great.
So excited that you had success! Because of you, I have taken a deep dive into the world of concrete and forms and boy, am I having fun! I wouldn’t mess with your current success, but one thing you might consider in the future for light weight concrete is adding perlite to the mix. It doesn’t seem to affect the strength of the concrete, but makes it lighter. I have used it in a hypertufa years ago, and was pleased with the results.
On my latest concrete journey, I discovered a way to make modular raised beds out of concrete, and hope to be using the method to create not only some raised flower beds, but also edging for my current flower beds, maybe decorated with hand molded cement clay using your silicone mold method.
So, thank you for always providing not only the details for what you are doing, but the inspiration to branch out and try things on my own!
Best wishes to you and Matt, your posts are always a highlight of my day.
This is so clever! Thanks for showing the steps.
Congrats on your success. Perseverance to the max!
Wondering if cooking spray would work as effectively as WD-40 without the repercussions.
Holy smokes does that look good!!!
I think the product company should pay you for the endorsement.
This looks so fabulous.
My thoughts: I would not rush this project. For one, how are these faux stones going to hold up to weather? Also, I would use PAM spray instead of WD40. For one, the oils in PAM are lighter, and WD40 is petroleum based, so heavy oil that may not allow primer/paint to adhere in the long run. I would hate to see you do all this work only to find it deteriorating a year or two later. Honestly, I would just paint the skirting black if it were me. And ALWAYS keep plantings 3-4 ft. from the foundation – ask me how I learned that the hard way!
Wow! Those stones look like authentic Austin stone! What is the cost comparison to purchasing stone or pavers to add to the foundation? How will you attach them to the foundation?
Kristi, you never cease to amaze with your resourcefulness and ability to achieve your goal! I look forward to seeing the end result!
I’m not sure about a cost comparison, but I plan to attach them with polyurethane adhesive. I took some time yesterday to compare/contrast the process and the pros/cons of using both mortar and polyurethane adhesive. Both would work, but I think the polyurethane adhesive is the more DIY-friendly way to go.
Absolutely AMAZING! I can not believe the amazing things you make! WELL done!!!